Setup Payeer SCI
- Enter your Payeer account.
- Switch to "Merchant Settings" page in right side menu.
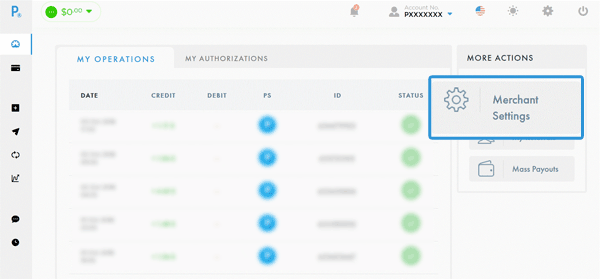
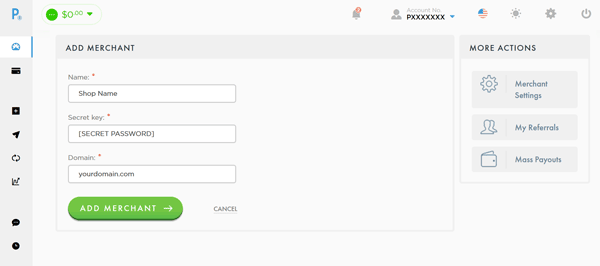
- Click on "Add Merchant" button.

- Fill Add Merchant Form:
Name - any name
Secret Key - save secret key Payeer was generated for you or enter your one.
Domain - your site domain
After click "Add Merchant" button site will ask you for your Master Key - your Payeer account Master Key to verify your identity.
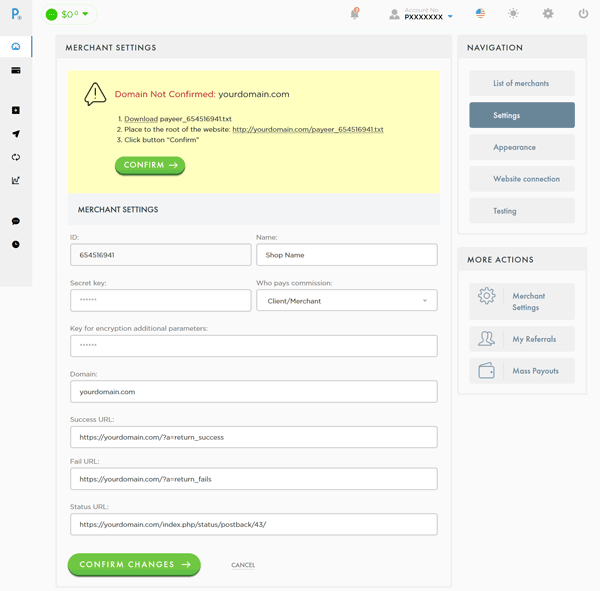
- Next step will show you your Shop ID (654516941 on example image).
You have to confirm your domain by creating file payeer_[Your Shop ID].txt on your host. You should place this file in same folder where HYIP Manager Pro's index.php is located. After you create file and upload it on your host click on "Confirm" button.
Also you should provide correct URLs to Shop settings:
Success URL - set to http://my_program_domain/?a=return_success
Fail URL - set to http://my_program_domain/?a=return_fails
Status URL - set to http://my_program_domain/index.php/status/postback/43/
For all URLs above - change "my_program_domain" to your site domain. If you are using HTTPS on your site change "http://" to "https://"
Save filled form. -
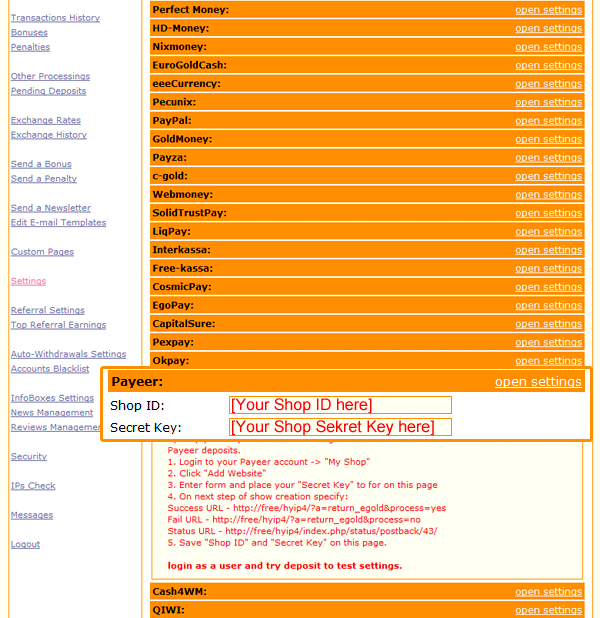
Enter HYIP Manager Pro admin panel Settings page and setup Payeer SCI:
- Do not forget save Settings.
- Create test user account and make deposit via Payeer to test your settings.
Setup Payeer API
- Enter your Payeer account.
- Switch to "Mass Payouts" page in right side menu.
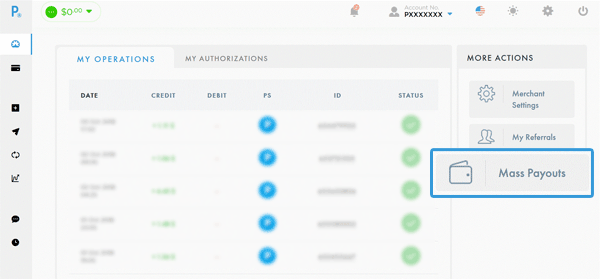
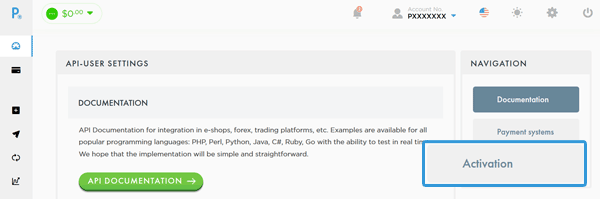
- Click on "Activation" button.
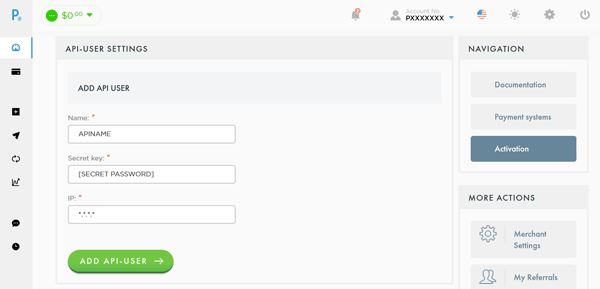
- Fill API User form:
Name - any name
Secret Key - save secret key Payeer was generated for you or enter your one (this key should be different from your accout password and Shop Secret Key).
IP - you can set "*.*.*.*" to allow access from any ip but for more security it should be your server outgoing IP. Get your server outgoing IP from your hoster.
After click on "Add API-User" button site will ask you for you Master Key - your Payeer account Master Key to verify your identity.
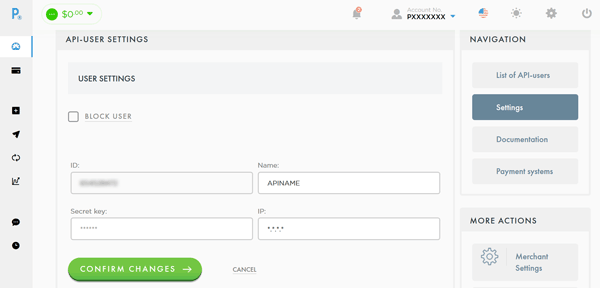
- Next step will show you your API ID.
- Enter HYIP Manger Pro admin panel Auto-Withdrawals Settings page and setup Payeer API:
Account ID - your Payeer ID (PXXXXXXX)
API ID - your API ID
API Key - your API Secret Key
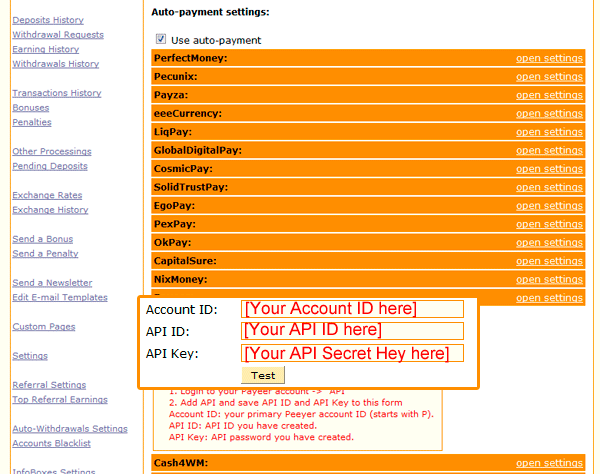
After you enter all required data you can click on "Test" button, to use script access Payeer API and get your balance. If data you have entered is valid and you setup API in your account correcly, you will see your USD balance. - Do not forget save Settings.